 Save to Pinterest
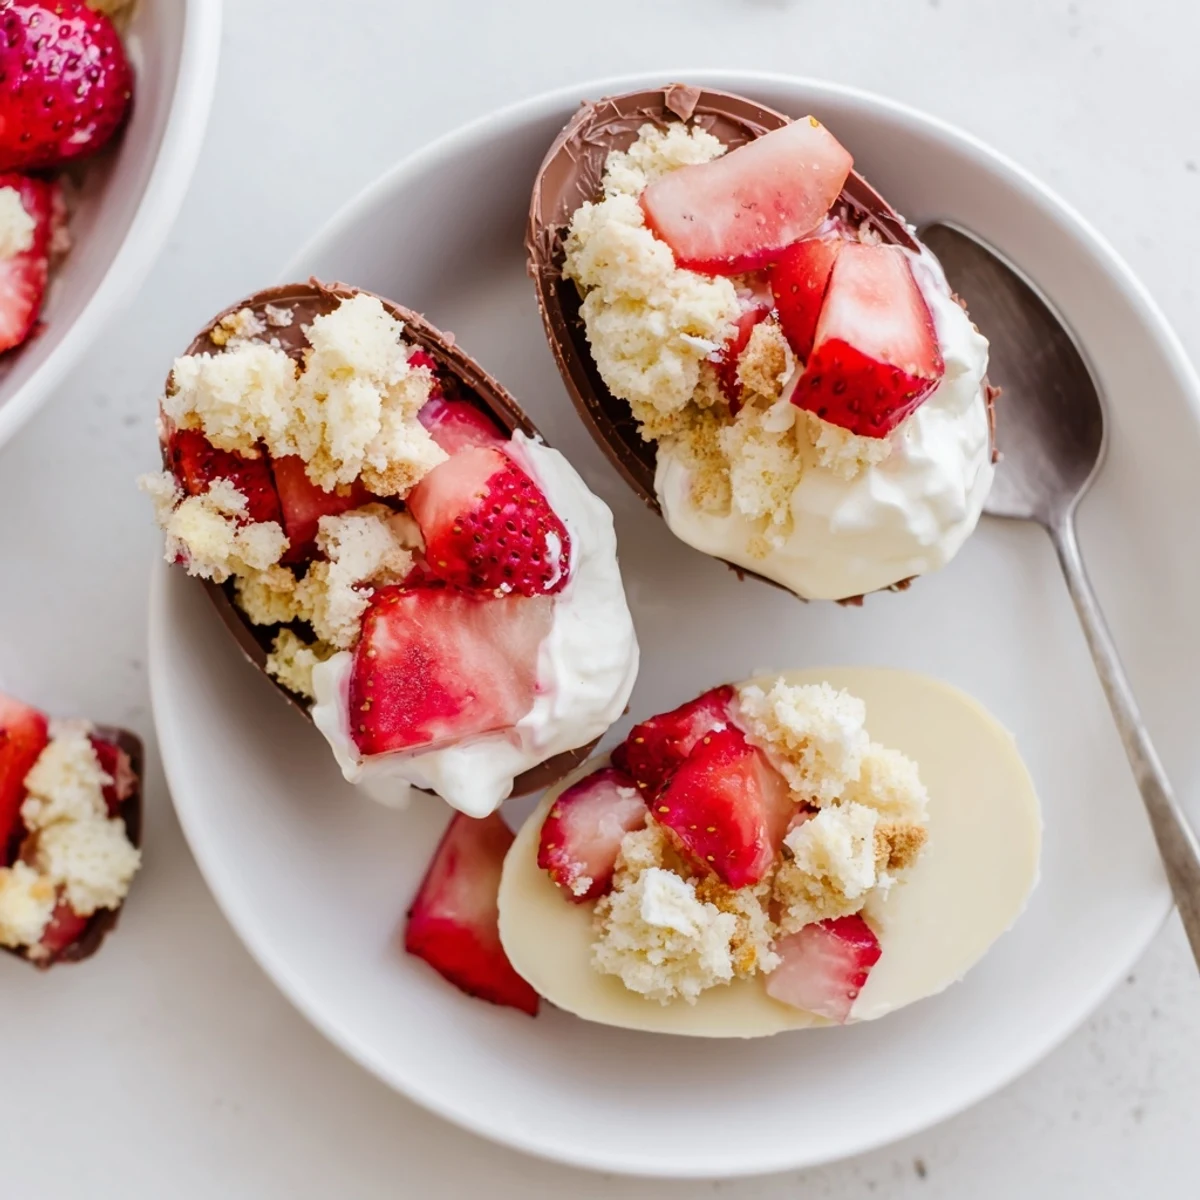
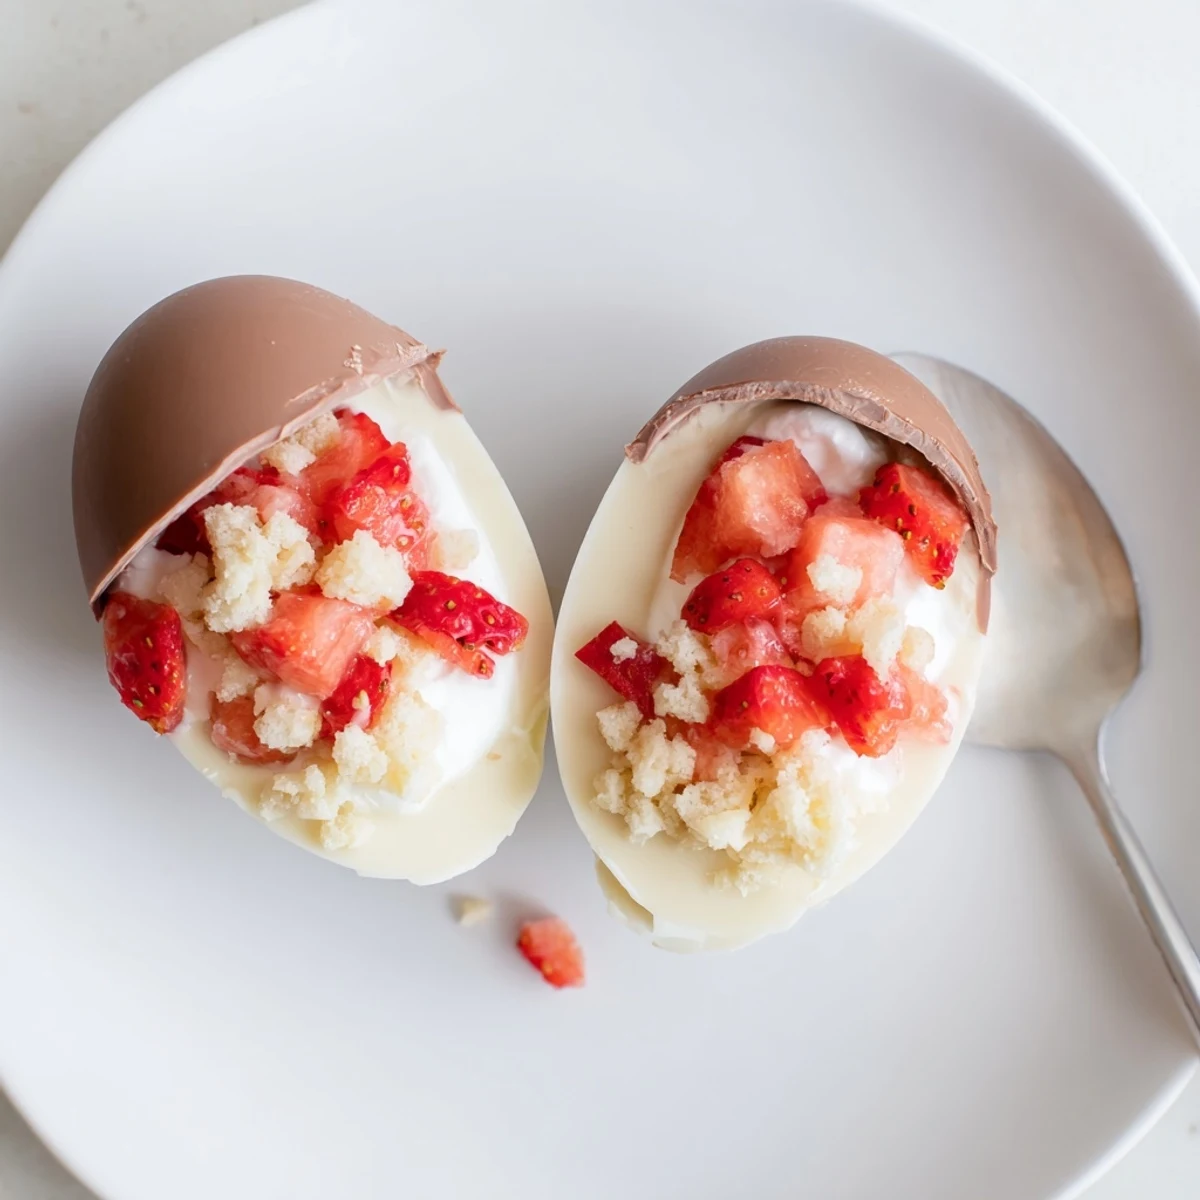
 These delightful Easter egg bombs capture all the classic flavors of strawberry shortcake in a fun, festive presentation. Fluffy homemade shortcake crumbs pair with macerated fresh strawberries and vanilla whipped cream, all encased in a crisp white chocolate shell shaped like an Easter egg.
The process involves baking tender shortcake rounds, preparing sweetened strawberry filling, and whipping light vanilla cream. The white chocolate shells are created in silicone Easter egg molds, requiring two coats for stability. Each bomb is assembled by layering the components and sealing with a second chocolate half.
These treats are ideal for Easter brunch, spring gatherings, or holiday dessert tables. The individual portions make serving easy, and the pastel-colored chocolate shells can be customized to match your celebration theme. They're best served chilled to maintain the chocolate shell's crisp texture while keeping the fillings fresh and creamy.
The kitchen smelled like butter and anticipation when I first attempted these Easter egg bombs. My daughter had been begging me to make something special for her class party, and I wanted to surprise her with something that would make all the kids' eyes light up. We spent the entire afternoon with chocolate smeared on our cheeks and flour dusting our noses, and when she brought home an empty container with requests for the recipe, I knew we'd stumbled onto something magical.
Last spring, I made these for our neighborhood Easter potluck and watched three generations fight over the last one. My neighbor's grandmother leaned over to whisper that she hadn't seen anything so charming since the bakery in her hometown closed forty years ago. Now every time April rolls around, I start getting text messages asking if the Easter egg bombs are making an appearance.
Ingredients
- 1 ½ cups all-purpose flour: The foundation of classic shortcake, giving structure without being heavy or dry
- ⅓ cup granulated sugar: Just enough sweetness to balance the tart strawberries while letting the butter shine through
- 2 tsp baking powder: Ensures the shortcake rises into those tender, flaky layers that crumble beautifully
- ¼ tsp salt: Enhances all the flavors and prevents the sweetness from becoming cloying
- 6 tbsp cold unsalted butter, cubed: Keeping it ice-cold is the secret to creating those flaky pockets in the shortcake
- ½ cup heavy cream: Creates richness in the dough while providing just enough liquid to bring everything together
- 1 large egg: Adds structure and helps the shortcake hold its shape during baking
- 1 ½ cups fresh strawberries, diced: Fresh strawberries release just the right amount of juice when they macerate
- 2 tbsp granulated sugar: Draws out the natural strawberry juices creating a syrupy sauce
- 1 tsp lemon juice: Brightens the strawberries and prevents them from tasting too sweet
- 1 cup heavy whipping cream: Whips into those billowy clouds that make strawberry shortcake unforgettable
- 2 tbsp powdered sugar: Sweetens and stabilizes the whipped cream without making it grainy
- 1 tsp vanilla extract: Deepens the flavor profile and rounds out the sweetness
- 12 oz white chocolate or candy melts: Creates the beautiful egg shell that protects everything inside
- Pastel food coloring: Optional, but transforms these into the most stunning pastel eggs you've ever seen
Instructions
- Bake the Foundation:
- Preheat your oven to 375°F and line a baking sheet with parchment paper. Whisk together the flour, sugar, baking powder, and salt in a large bowl, then cut in the cold butter until the mixture looks like coarse crumbs.
- Bring It Together:
- Whisk the cream and egg in a small bowl, then pour into the flour mixture. Stir until just combined, turn onto a floured surface, and pat to ¾-inch thickness before cutting into small rounds with a 2-inch cutter.
- Create Golden Clouds:
- Bake the shortcake rounds for 12 to 15 minutes until they're golden brown. Let them cool completely, then crumble them into bite-sized pieces that will tuck perfectly inside your chocolate shells.
- Wake Up the Berries:
- Toss the diced strawberries with sugar and lemon juice in a bowl. Let them sit for 15 minutes while you prep everything else, allowing the sugar to draw out those gorgeous juices.
- Whip Clouds:
- Beat the heavy cream with powdered sugar and vanilla until you reach stiff peaks. Be careful not to overwhip or you'll end up with butter instead of fluffy cream.
- Prepare the Shells:
- Melt the white chocolate in 30-second intervals in the microwave, stirring until completely smooth. Divide and tint with pastel colors if you're going for that festive Easter look.
- Build the Eggs:
- Brush or spoon melted chocolate into your silicone Easter egg molds, making sure to coat the sides evenly. Chill for 10 minutes, add a second coat for strength, and chill again until completely firm.
- Unmold Carefully:
- Gently peel back the silicone to release your beautiful chocolate egg halves. Work quickly and handle them as little as possible since the warmth from your hands can start to soften the chocolate.
- Fill the Treasure:
- Layer shortcake crumbs, macerated strawberries, and whipped cream inside half of each egg shell. Top with more shortcake crumbs if you want extra crunch in every bite.
- Seal the Secret:
- Warm the edges of the empty shell half slightly and press onto the filled half to create a seal. Repeat until all your eggs are assembled, then decorate with drizzled chocolate or sprinkles if desired.
 Save to Pinterest
 My niece called me last Easter morning completely panicked because she'd forgotten to make dessert for dinner. I talked her through these egg bombs step by step over the phone, and when I saw the pictures later that evening, they were perfect. Sometimes the best recipes are the ones that save the day.
Making Them Ahead
You can prepare all the components up to two days in advance, storing the shortcake crumbs, macerated strawberries, and whipped cream separately in the refrigerator. The chocolate shells keep beautifully in an airtight container at room temperature. Assemble everything the morning you need them for the freshest texture and presentation.
Getting Creative with Fillings
Once you master the basic technique, the flavor combinations are endless. Try swapping the strawberries for fresh raspberries with a hint of lime, or go tropical with diced mango and toasted coconut. Chocolate lovers can add a layer of ganache, and a splash of amaretto in the whipped cream transforms these into something completely sophisticated.
Working with Chocolate Shells
The temperature of your kitchen makes a huge difference when working with chocolate. If your house is particularly warm, work in shorter sessions and keep returning the molds to the refrigerator. Room temperature chocolate creates the smoothest, most professional-looking shells.
- Use silicone molds specifically designed for chocolate making
- Let the molded shells set completely before attempting to remove them
- Store finished eggs in the refrigerator until serving time
 Save to Pinterest
 There's something absolutely delightful about watching someone crack open these eggs and discover the surprise inside. Hope they bring as much joy to your table as they've brought to mine.
Recipe FAQs
- → How far in advance can I make these Easter egg bombs?
-
You can prepare the shortcake crumbs and macerated strawberries up to 2 days ahead. Assemble the chocolate shells and fill them within 24 hours of serving for the best texture. Store assembled bombs in the refrigerator to keep the chocolate shell firm and prevent the filling from becoming too soft.
- → What if I don't have Easter egg molds?
-
You can use any silicone mold shape that creates two halves—hemisphere molds work well for creating sphere shapes. Alternatively, use small silicone cupcake liners to create individual cups layered with the shortcake mixture, or press the mixture into a lined baking pan and cut into squares or rectangles.
- → Can I use store-bought shortcake instead of making it from scratch?
-
Absolutely. Store-bought shortcake cups, pound cake, or even ladyfingers work well as substitutes. Crumble them into small pieces similar to the homemade version. This shortcut saves time while still delivering delicious results. Just ensure whatever you use isn't too soft or it may make assembly difficult.
- → How do I prevent the white chocolate from seizing when melting?
-
Melt white chocolate slowly in 30-second intervals at 50% power, stirring thoroughly between each interval. Avoid getting any water in the chocolate as even a drop can cause seizing. If it does seize, add a teaspoon of coconut oil or vegetable oil and stir vigorously to smooth it out again.
- → Can I make these dairy-free?
-
Yes. Use dairy-free white chocolate chips or coconut butter for the shells. Replace heavy cream with full-fat coconut cream for both the shortcake and whipped cream. Use plant-based butter for the shortcake dough and a flax egg (1 tablespoon ground flaxseed + 3 tablespoons water) instead of the regular egg.
- → What's the best way to seal the chocolate egg halves together?
-
Gently warm the edges of one chocolate half on a warm plate or with a hair dryer set to low heat for just a few seconds. The chocolate should become slightly tacky but not melted. Press firmly against the filled half and hold for 10-15 seconds. You can also brush a small amount of melted chocolate along the edge before sealing for extra security.
