 Save to Pinterest
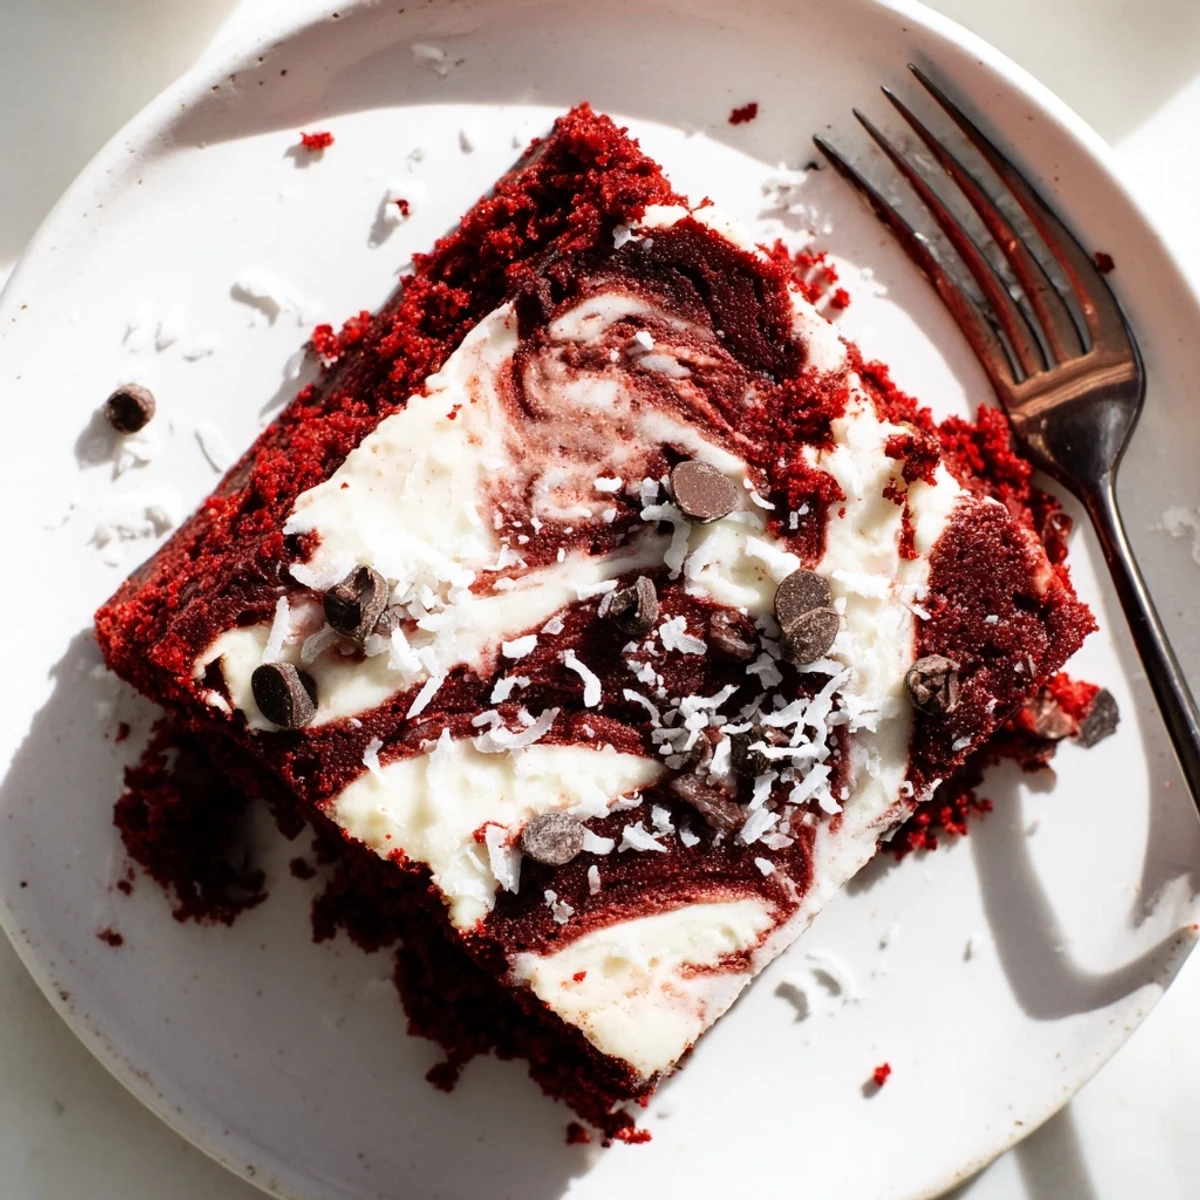
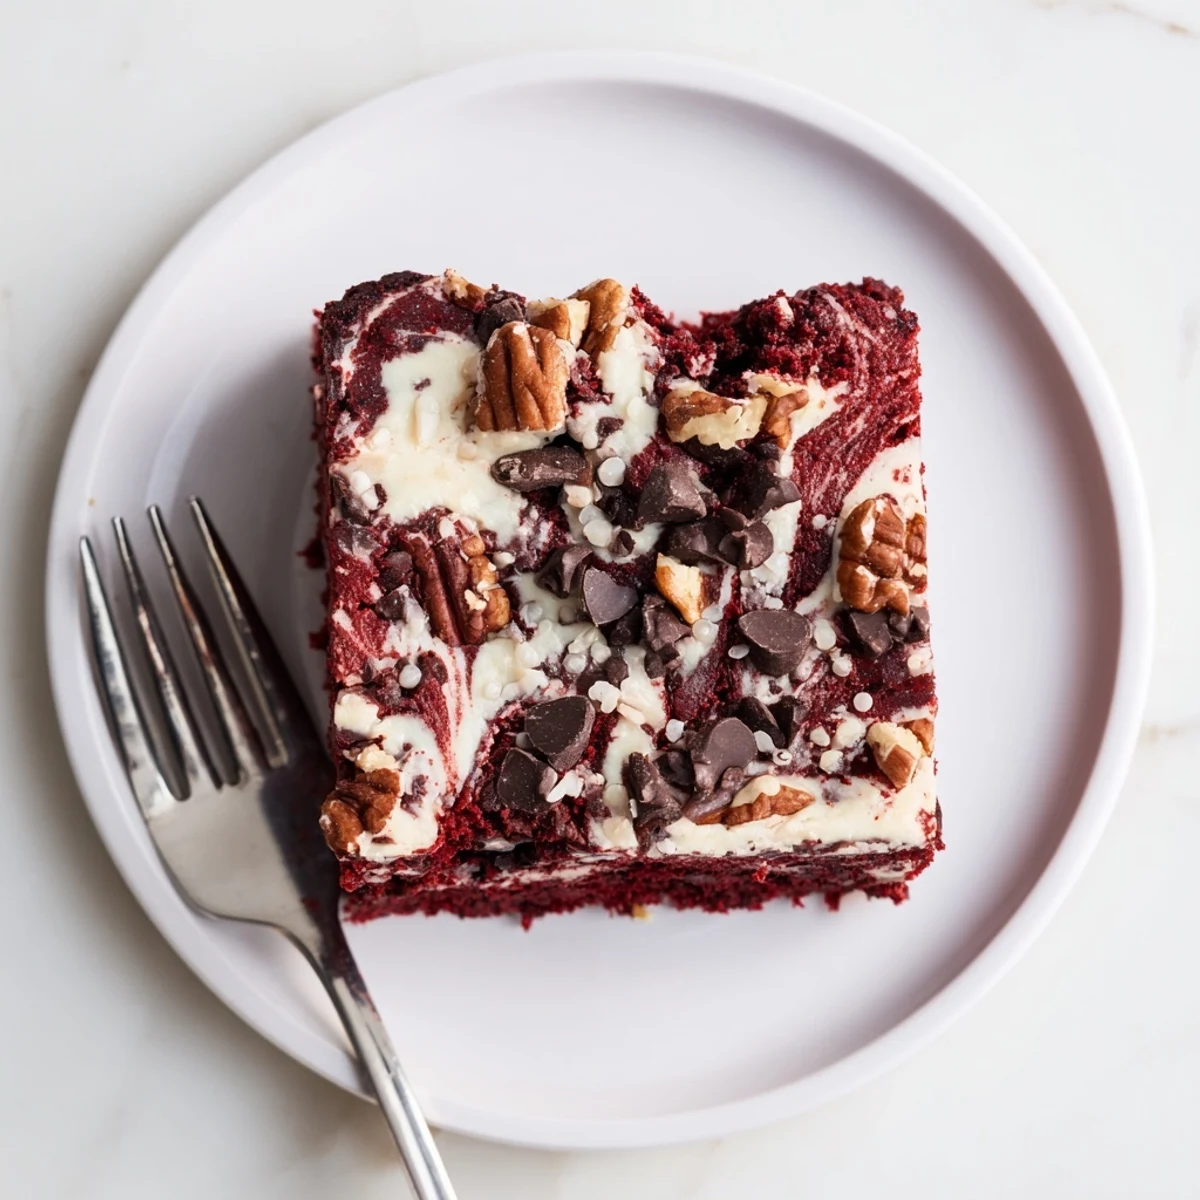
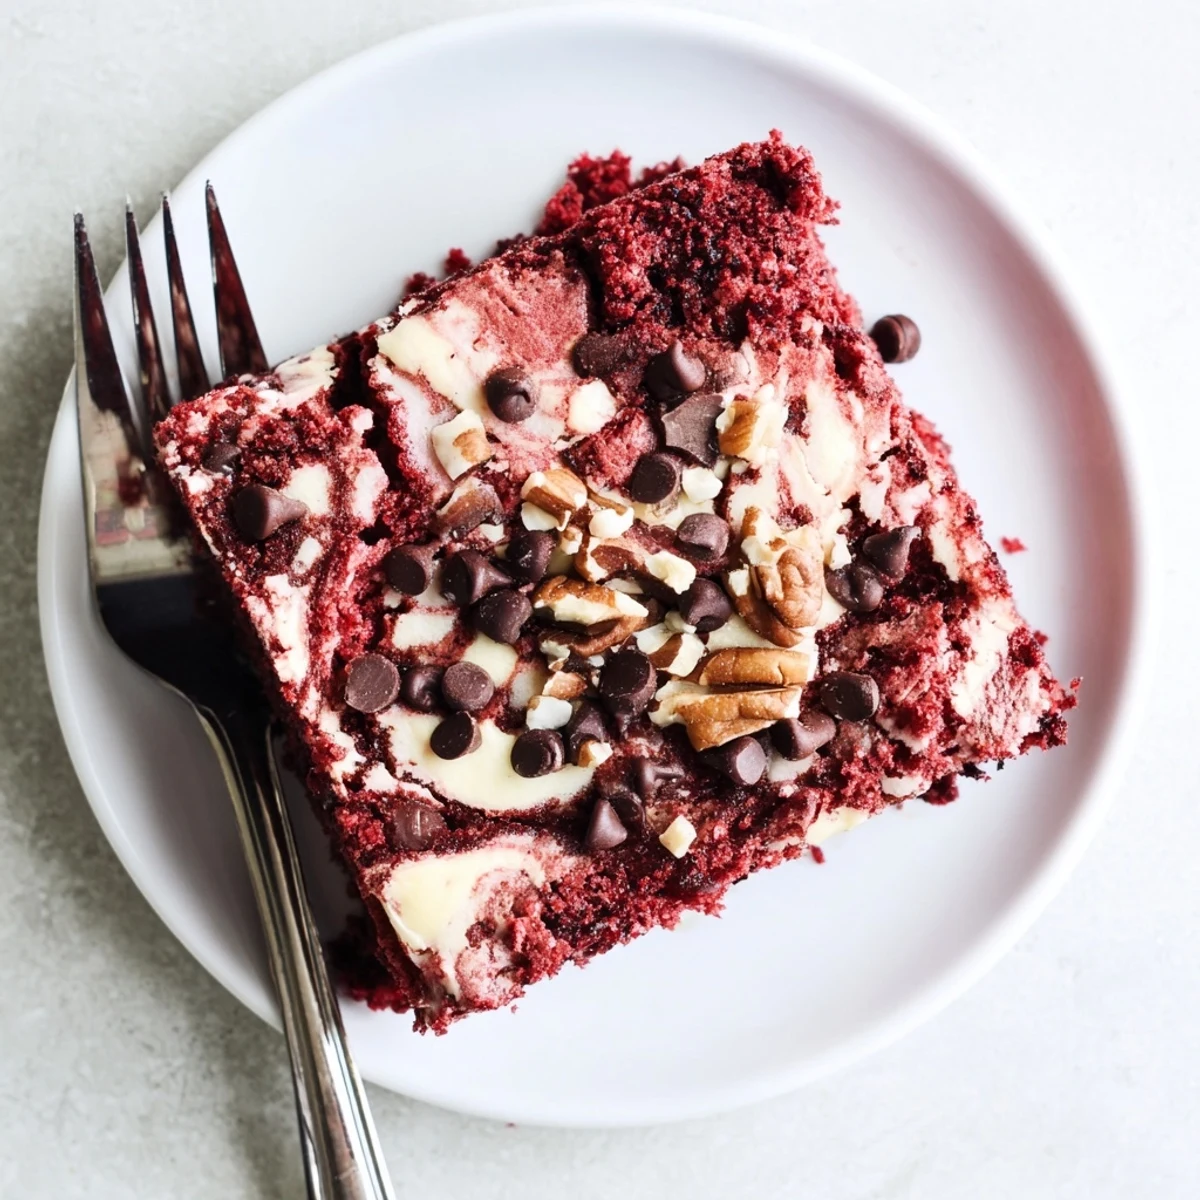
 Indulge in this luscious red velvet creation featuring a rich cream cheese swirl that creates dramatic cracks and crevices throughout the batter. The magic happens during baking, producing irresistibly gooey pockets and a marbled appearance that gives this dessert its earthquake-inspired name. Chocolate chips melt into the warm batter while toasted pecans and sweet coconut add delightful crunch and texture to every bite.
Perfect for gatherings or cozy evenings at home, this crowd-pleasing treat balances the classic tangy sweetness of red velvet with creamy, indulgent swirls. Serve warm for maximum gooeyness, or chilled for a firmer, more structured slice that still delivers on flavor and texture.
The name alone stopped me in my tracks at the potluck. Earthquake cake. I watched everyone drift toward the dessert table, drawn by these mysterious cracks and crevices revealing pockets of cream cheese and chocolate beneath the surface. Someone mentioned it was red velvet, and suddenly that jagged, imperfect beauty made perfect sense.
I brought this to a friend's birthday dinner, planning to arrive fashionably late with a store-bought backup in case it flopped. The kitchen timer beeped while I was getting dressed, and I pulled it from the oven to find a gloriously messy landscape of sunkissed cracks and chocolate-studded valleys. We ended up eating half the pan straight from the 9x13 with forks, standing around the counter, before I even remembered to take a photo.
Ingredients
- Red velvet cake mix: The foundation that gives this cake its signature color and subtle cocoa undertones without requiring measuring cups of flour and cocoa
- Buttermilk: Essential for tender crumb and that classic red velvet tang, though regular milk with a splash of vinegar works in a pinch
- Cream cheese: Let it come to room temperature completely or your swirl will tear through the batter instead of creating those gorgeous marbled pockets
- Unsalted butter: Room temperature butter blends seamlessly into the cream cheese mixture for that silky smooth swirl layer
- Powdered sugar: Sift it if you notice lumps, because nobody wants grainy cream cheese pockets in their velvet landscape
- Semi-sweet chocolate chips: They sink slightly into the batter during baking, creating little molten chocolate surprises throughout
- Chopped pecans: Optional but highly recommended for that nutty crunch that plays so beautifully against the creamy swirls
- Sweetened shredded coconut: Adds sweetness and texture while toasting golden on top, though my coconut-hating friends never notice it is there
Instructions
- Get everything ready:
- Preheat your oven to 350°F and generously grease a 9x13 baking pan. Pull out your cream cheese and butter early so they have time to soften completely, which makes all the difference for smooth swirls.
- Make the red velvet batter:
- Dump the cake mix, eggs, oil, buttermilk, and vanilla into a large bowl. Mix until everything comes together smoothly, about two minutes. Pour this vibrant red mixture evenly into your prepared pan.
- Whip up the cream cheese layer:
- In a separate bowl, beat the softened cream cheese and butter until creamy and combined. Add the powdered sugar and vanilla, beating until fluffy and smooth. This mixture should be thick enough to hold its shape when dropped from a spoon.
- Create the earthquake effect:
- Drop spoonfuls of the cream cheese mixture randomly over the red velvet batter. Use a knife or skewer to gently swirl through both layers, creating that marbled look. Do not overdo it, those distinct pockets of cream cheese are what makes this cake special.
- Add the toppings:
- Sprinkle chocolate chips, pecans, and coconut evenly across the surface. They will sink slightly during baking, creating those beautiful crevices and giving the cake its earthquake appearance.
- Bake until just set:
- Bake for 38 to 42 minutes. The center should be mostly set with a few gooey spots remaining. Overbaking will dry out those precious cream cheese pockets, so pull it out when it still feels slightly jiggly in the center.
- Patience is everything:
- Let the cake cool in the pan for at least 30 minutes before slicing. This resting period allows the cream cheese swirls to set properly so you get clean slices instead of a messy situation.
 Save to Pinterest
 My grandmother took one bite and closed her eyes, declaring it better than the German chocolate cake she had made every Sunday for forty years. High praise from someone who measured success by how many people asked for seconds. This earthquake cake has become my go-to for moments that call for something unforgettable.
Making It Your Own
Once you master the basic technique, the variations are endless. I have swapped the red velvet mix for chocolate fudge cake mix when I wanted something even richer. White chocolate chips create a stunning contrast against the red crumb, while walnuts bring a earthiness that pairs perfectly with the tangy cream cheese swirl.
Serving Suggestions
This cake deserves to be the star of the show. Serve it slightly warm with a scoop of vanilla ice cream melting into those chocolate-studded crevices. Cold milk cuts through the richness beautifully, or try it with a hot cup of coffee for an afternoon treat that feels completely indulgent.
Storage and Make-Ahead Tips
The flavors actually improve after a day in the refrigerator, as the cream cheese swirl melds into the surrounding cake. Wrap it tightly and store at room temperature for up to three days, or refrigerate for up to a week. You can also freeze individual portions for those emergency dessert cravings.
- Bring refrigerated cake to room temperature before serving for the best texture
- Recover that freshly baked warmth by microwaving individual slices for 15 seconds
- The cream cheese swirl softens more quickly at room temperature, which some people actually prefer
 Save to Pinterest
 There is something deeply satisfying about a dessert that celebrates its imperfections. This earthquake cake turns mistakes into magic, proving that the most beautiful things often come from embracing the unexpected.
Recipe FAQs
- → Why is it called earthquake cake?
-
The name comes from the dramatic cracked and creviced appearance that develops during baking. As the cream cheese swirl sinks and the cake rises, it creates fault-line patterns reminiscent of earthquake activity, making each slice unique and visually striking.
- → Can I make this from scratch instead of using a cake mix?
-
Absolutely. Substitute the box mix with your favorite homemade red velvet cake batter. Just ensure you have approximately 4 cups of batter to maintain the proper ratio with the cream cheese swirl layer.
- → How do I know when it's done baking?
-
The center should be mostly set but still slightly jiggly—those gooey spots are intentional and desirable. A toothpick inserted in the center should come out with moist crumbs but not wet batter. Overbaking will reduce the signature gooey texture.
- → Can I prepare this dessert ahead of time?
-
Yes, it actually improves after chilling. Bake up to two days in advance, cool completely, cover tightly, and refrigerate. The flavors meld beautifully, and the texture becomes easier to slice while remaining deliciously rich and creamy.
- → What substitutions work for the mix-ins?
-
Feel free to customize with your favorite additions. Try white chocolate chips, walnuts instead of pecans, or omit coconut entirely. For extra indulgence, add a handful of dark chocolate chunks or butterscotch chips to the topping mixture.
