 Save to Pinterest
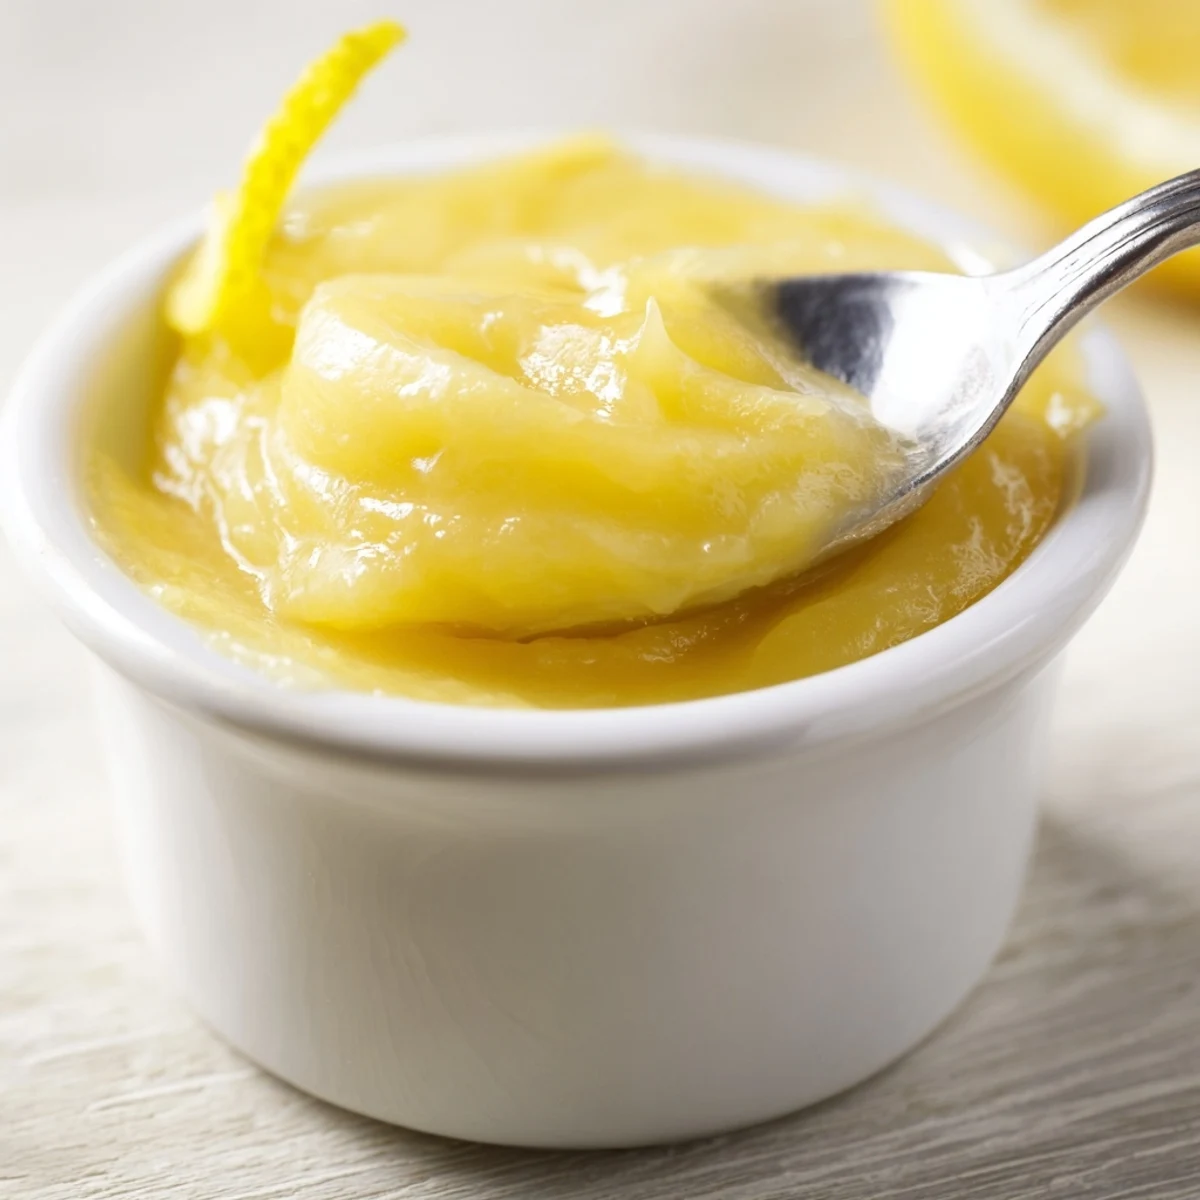
 Silky lemon curd made by whisking whole eggs plus an extra yolk with sugar, fresh lemon zest and juice, then cooking gently over simmering water. Add cubed butter and whisk until the mixture thickly coats a spoon. Strain for velvety texture, cover surface with plastic wrap to avoid a skin, and chill until set. Use only yolks for a richer texture, stir constantly to prevent curdling, and store in an airtight jar in the fridge up to two weeks.
The smell of lemons being zested will always pull me straight into my grandmothers kitchen, where a small jar of curd sat in the fridge like edible sunshine. I used to sneak spoonfuls of the stuff when nobody was looking, convinced I was getting away with something. That sharp, buttery sweetness is something I now make on quiet Sunday mornings when the house is still and the light is soft through the window. It takes almost no time at all, which feels like a small victory before the week even begins.
I once brought a jar of this to a friends brunch and watched three grown adults fight over the last smear on a scone. Nobody believed me when I said it took less than half an hour. There is something deeply satisfying about whisking it by hand and feeling it transform from a thin, frothy liquid into something thick and golden right beneath your fingers.
Ingredients
- 3 large lemons (zest and about 120 ml juice): Use unwaxed lemons if you can find them because the zest goes directly into the curd and you want it clean and fragrant.
- 115 g unsalted butter (cubed): Cold cubes melt gradually into the mixture, which helps keep everything smooth and emulsified.
- 3 large eggs plus 1 egg yolk: The extra yolk is what gives the curd its rich, luxurious body without needing cream.
- 200 g granulated sugar: This balances the tartness perfectly, but you can nudge it up or down depending on how bracing you like your curd.
Instructions
- Whisk everything together:
- Crack the eggs and extra yolk into a heatproof bowl, pour in the sugar, lemon zest, and juice, and whisk until the mixture looks unified and slightly frothy on top.
- Set up your double boiler:
- Fill a saucepan with a couple inches of water and bring it to a gentle simmer, then rest the bowl on top so it hovers above the water without touching it.
- Add butter and cook patiently:
- Drop in the butter cubes and whisk continuously for 10 to 15 minutes, watching as the liquid slowly thickens into something that clings to the back of a spoon like warm silk.
- Strain for smoothness:
- Pour the curd through a fine mesh sieve into a clean bowl, pressing gently with a spatula to catch any bits of cooked egg or stray zest.
- Cool and chill:
- Lay plastic wrap directly on the surface of the curd so no skin forms, then refrigerate for at least two hours until it sets into that perfect spreadable consistency.
 Save to Pinterest
 I still keep a small jar in the fridge during winter when citrus is at its peak and everything else feels grey. It has become my favorite thing to stir into plain yogurt on a slow Tuesday morning.
Storing and Keeping It Fresh
This curd keeps beautifully in an airtight container in the fridge for up to two weeks, and it actually tastes better on the second day when the flavors have settled. You can also freeze it for up to three months, though the texture softens slightly once thawed. I usually make a double batch and stash jars in the back of the fridge as small gifts for people who drop by unexpectedly.
Serving Ideas Beyond the Obvious
Layer it between sponge cake rounds, swirl it into whipped cream for a quick dessert parfait, or thin it slightly with warm water and drizzle it over pancakes. My favorite unexpected use is spreading it on a piece of sourdough toast with a sprinkle of flaky salt on top. The contrast of tart, sweet, and savory is genuinely addictive.
Troubleshooting and Final Thoughts
If your curd looks thin after chilling, it likely needed a few more minutes over the water and will still taste wonderful. Every batch teaches you something new about timing and instinct.
- Use a silicone whisk if you have one because it is gentler on the bowl and quieter on the ears.
- Taste the lemons before you start since their acidity can vary wildly depending on the season.
- Remember that the curd thickens further as it cools, so do not panic if it seems loose right off the heat.
 Save to Pinterest
 Once you have a jar of homemade lemon curd in your refrigerator, you will find excuses to put it on everything. It is one of those small kitchen pleasures that turns an ordinary moment into something worth savoring.
