 Save to Pinterest
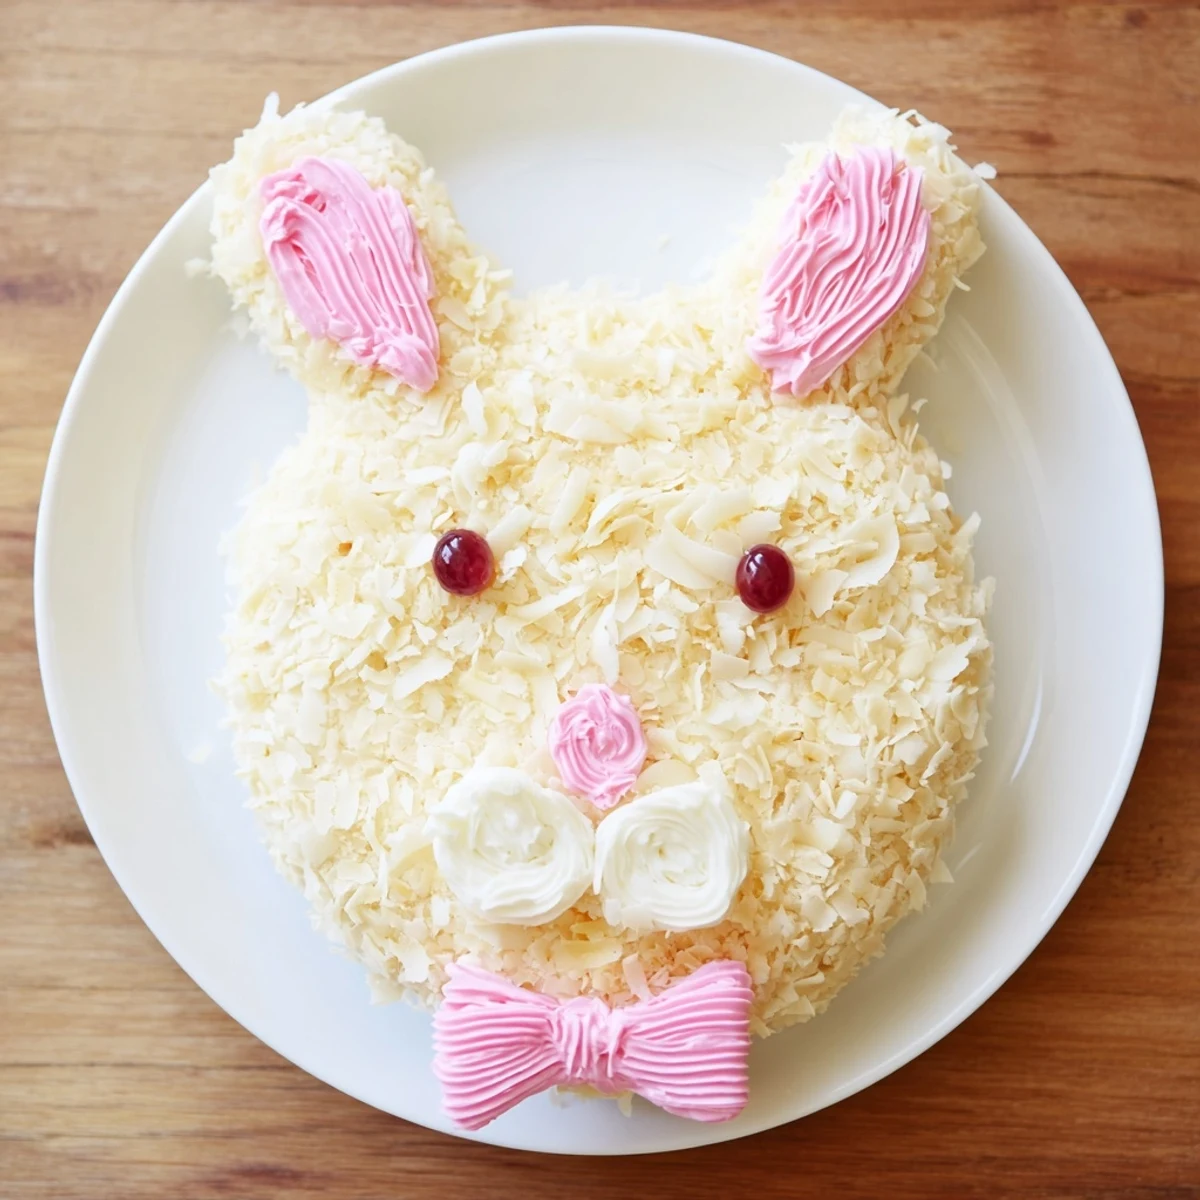
 This charming bunny-shaped dessert features tender vanilla cake layers coated in smooth buttercream and covered with shredded coconut for a furry texture. The creative assembly transforms simple round cakes into an adorable Easter centerpiece with whimsical bow tie details.
Perfect for spring celebrations, this treat comes together with basic pantry ingredients and straightforward baking techniques. The decoration possibilities are endless—from pink-tinted coconut ears to candy facial features—making it a fun project for bakers of all skill levels.
Last spring, my niece asked if we could make a bunny cake for her birthday, and I hesitated because shaped cakes always seemed like the kind of project that ended in Pinterest fails and tears. But there we were, kitchen covered in flour and coconut, her hands sticky with pink frosting, grinning like we had pulled off the greatest magic trick in the world. That afternoon taught me that sometimes the most memorable desserts are the ones that make people laugh before they even take a bite.
I made this again for Easter brunch last year, setting it on the buffet table between the ham and the fruit salad. My brother in law stood there for a full minute just staring at it, genuinely confused about how I managed to make something that looked like it came from a fancy bakery window. The best part was watching the kids debate over who got the piece with the bow tie.
Ingredients
- All-purpose flour: The backbone of this tender cake, providing structure while keeping each bite soft and cake-like
- Baking powder and baking soda: Work together to give the cake its rise, ensuring it bakes up fluffy and light instead of dense
- Unsalted butter: Room temperature butter creates that perfect creamed base, giving the cake rich flavor and a tender crumb
- Granulated sugar: Sweetens the cake while also helping create that golden brown crust and tender texture
- Large eggs: Bind everything together and add structure, making sure the cake holds its shape when you cut it into the bunny pieces
- Whole milk: Adds moisture and richness, keeping the cake from drying out during baking
- Vanilla extract: Pure vanilla is worth the extra cost here, infusing every bite with warm, comforting flavor
- More butter for frosting: Cold butter would give you a grainy mess, but softened butter whips into silky smooth frosting that spreads like a dream
- Powdered sugar: Sifting it first prevents lumpy frosting, and it sweetens while giving the buttercream structure
- Shredded sweetened coconut: This is what makes the bunny look fluffy and adorable, and it adds the most incredible texture and subtle sweetness
- Pink food coloring: Just a drop transforms plain coconut into those sweet inner ear details
- Jelly beans or mini candies: Perfect for creating that bunny face without any complicated piping or special tools
- Pink and white fondant or marshmallows: Fondant gives clean, defined ears, but marshmallows work beautifully for a softer, more rustic look
Instructions
- Get your oven ready:
- Preheat to 350°F and grease those pans like your cake depends on it, because nothing ruins the moment faster than stuck edges
- Whisk the dry ingredients:
- Combine the flour, baking powder, baking soda, and salt in a medium bowl so everything is evenly distributed
- Cream the butter and sugar:
- Beat them until they are pale and fluffy, which takes longer than you think but makes all the difference in texture
- Add the eggs:
- Beat them in one at a time, letting each one fully incorporate before adding the next, then stir in the vanilla
- Combine everything:
- Alternate adding the flour mixture and milk, starting and ending with the flour, mixing just until combined
- Bake the cakes:
- Divide batter between the pans and bake for 22 to 25 minutes, until a toothpick comes out clean
- Cool completely:
- Let them rest in the pans for 10 minutes, then turn them out onto wire racks to cool all the way through
- Make the frosting:
- Beat butter until smooth, then gradually add powdered sugar, vanilla, salt, and enough milk for spreadable consistency
- Shape your bunny:
- Leave one cake whole for the face, cut the second into two oval ears and shape the center into a bow tie
- Assemble and coat:
- Arrange pieces on a large tray, apply a thin crumb coat, chill for 20 minutes, then frost completely
- Add the coconut fur:
- Press shredded coconut all over the frosted cake, patting gently to help it stick and cover every surface
- Create the inner ears:
- Tint a small amount of coconut with pink food coloring and gently press it onto the ear sections
- Add the final details:
- Use fondant or marshmallows to finish the ears and place candies for the nose, eyes, and any other decorations
 Save to Pinterest
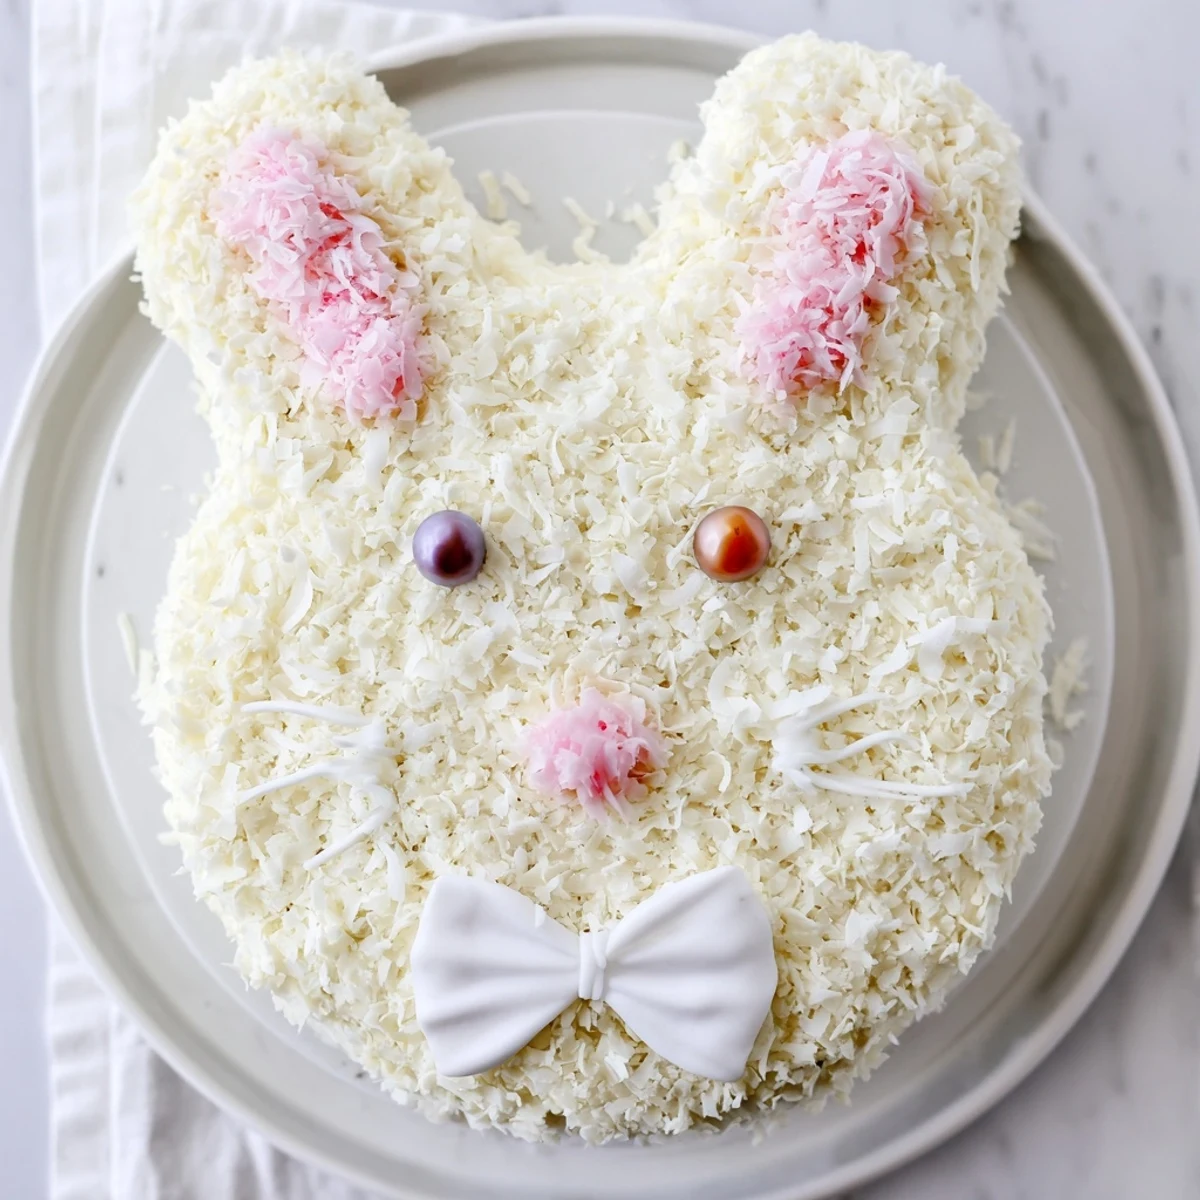
 My daughter helped me decorate our bunny cake last spring, and she insisted on giving it a giant pink jellybean nose that made the whole thing look perpetually surprised. We laughed so hard trying to get the ears to stand up straight, and honestly, that slightly lopsided, joyful bunny became the highlight of the entire celebration.
Making Ahead And Storage
You can bake the cake layers a day ahead and wrap them tightly in plastic wrap at room temperature. The frosting can be made ahead too and stored in the refrigerator, but let it come to room temperature and give it a quick whip before using. Once assembled, this cake keeps surprisingly well covered at room temperature for up to two days.
Decoration Variations
Sometimes I skip the coconut fur and pipe the buttercream fluffy all over for a different texture. You can also use chocolate cake as the base and press chocolate sprinkles or crushed cookies over the frosting instead of coconut. For an even simpler version, store bought frosting works in a pinch, and you can use licorice strips for whiskers if you want extra detail.
Serving Suggestions
This cake makes such a statement that it really does not need much else on the table. I like to serve it with fresh berries or a light fruit salad to balance the sweetness. A glass of cold milk feels perfect with the vanilla flavors, but for a celebration, a sparkling lemonade or lightly sweet Moscato makes everything feel festive.
- Set out extra candies and let guests add their own finishing touches
- Cut the first slice yourself to show guests how to navigate the shape
- Take pictures before serving because this bunny is as temporary as it is adorable
 Save to Pinterest
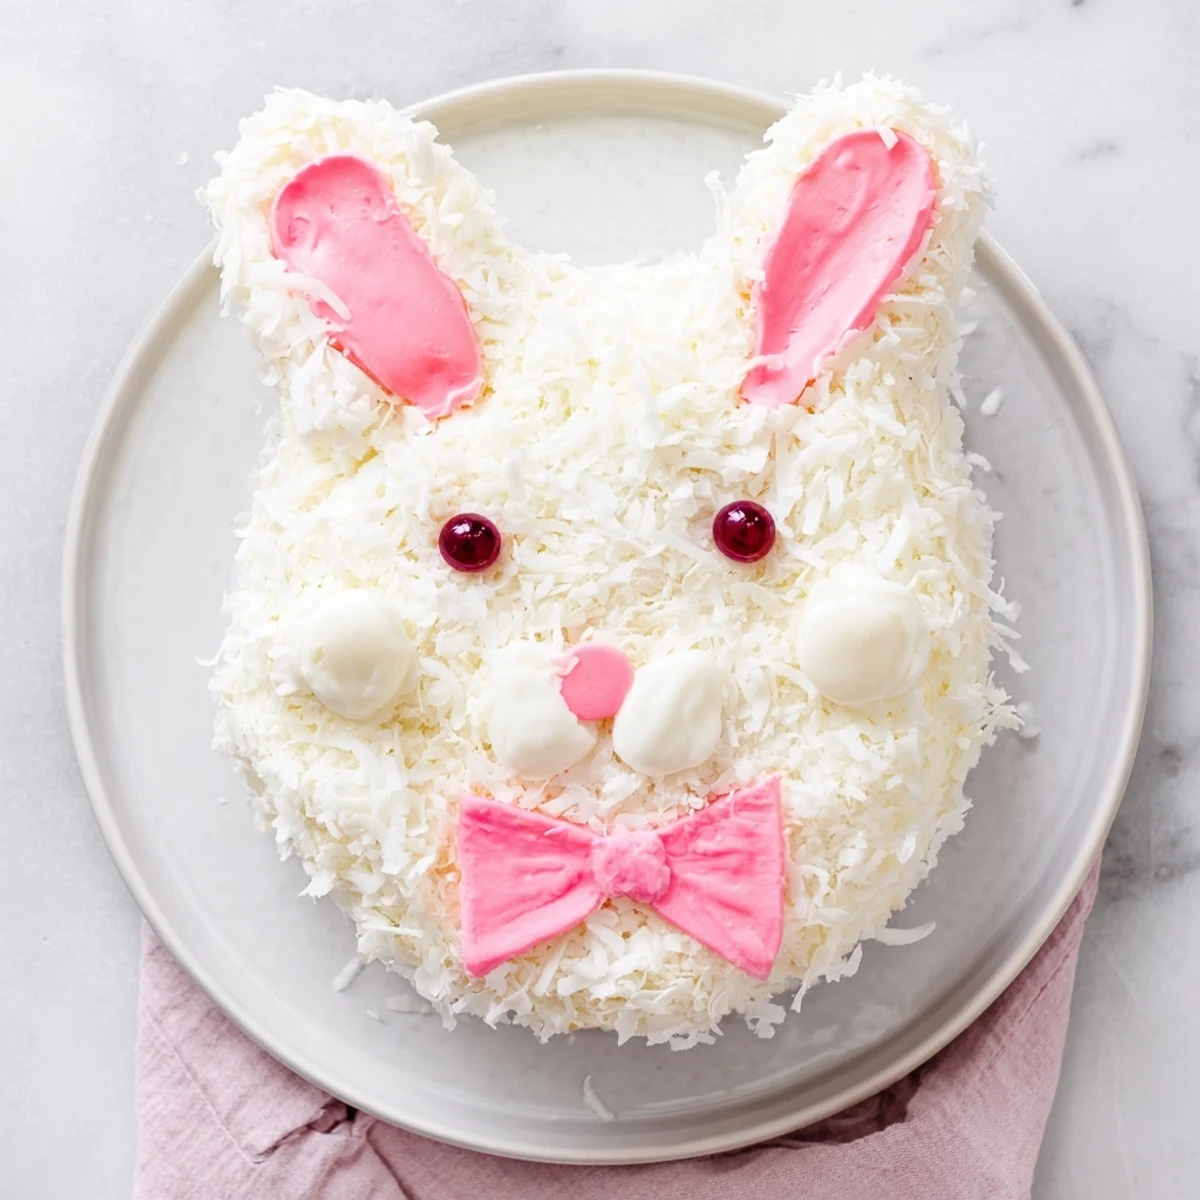
 There is something so wonderful about serving a dessert that makes people lean in closer and smile before they even take a bite. This bunny cake is not just about the flavors, it is about the joy of creating something whimsical and sharing that moment of delight with the people you love.
Recipe FAQs
- → How far in advance can I make this bunny cake?
-
You can bake the cake layers up to 2 days ahead. Wrap them tightly in plastic and store at room temperature. The frosted and decorated cake keeps well for up to 2 days at room temperature or 4 days refrigerated, though the coconut may soften slightly over time.
- → Can I use chocolate cake instead of vanilla?
-
Absolutely! Chocolate cake pairs wonderfully with coconut and creates a striking contrast against the white coconut fur. Simply substitute your favorite chocolate cake batter for the vanilla layers while keeping the same baking times and temperatures.
- → What's the best way to cut the bunny shape?
-
Leave one 8-inch round whole for the face. Cut the second round in half to create two oval ears, then trim the remaining center portion into a bow tie shape. Arrange all pieces on your serving platter before frosting to ensure proper placement.
- → Can I use store-bought frosting to save time?
-
Yes, store-bought vanilla buttercream or cream cheese frosting works perfectly. You'll need approximately 2-3 containers to cover and decorate the entire cake. The coconut topping helps hide any imperfections in the frosting application.
- → How do I color the coconut pink for the inner ears?
-
Place a small handful of shredded coconut in a sealable plastic bag. Add 1-2 drops of pink food coloring, seal the bag, and massage gently until evenly distributed. For deeper color, add more coloring one drop at a time. Spread on paper towel to dry briefly before applying.
- → What alternatives work for the facial features?
-
Get creative with what you have! Pink and white marshmallows, jelly beans, M&Ms, chocolate chips, or fondant all work well for eyes and noses. Licorice laces make perfect whiskers. Even heart-shaped sprinkles can create adorable expressions.
